In this video going to show to sort LEGO and keep it sorted. We will also look at some space saving techniques and what I call “Tetrising” of LEGO. I get asked about storage a lot so in this video I’m going to give some ideas. I don’t believe in a 1 size fits all approach. I think it depends largely on you and your kids building style and play pattern.
What do you do for storage? How do you manage LEGO? We are always on the look out for new ways and ideas so sound off in the comments below.
Affiliate links that help support the making of these videos and the channel.
Von Haus 44 Multi Drawer Storage Cabinet: https://amzn.to/3cwBEsi
Brother PT-700 Label Maker: https://amzn.to/2PCRtDE
Arko-Mils 64 Drawers Plastic: https://amzn.to/3agLQTI
Sterilite 3-Drawer Organizer: https://amzn.to/32DvamQ
Label PDF that can be downloaded from Brick Architect as either PDF or Brother P-touch label printers:
#legostorage #sorting #legosorting #legos #legopickabrick #lego #legocollection #legoparts #legotour #legovideo #legoparts #legoafol #afol #legoman #legolife #legobuilder #legoideas #legocreations #legoinstragram #legofan #legocommunity #afolclub #legofun #legomania #legoart #legostagram #legofanart
Transcript from the show:
G’day Everyone, Matt Elder of mattelder.com here and in this video going to show to sort LEGO and keep it sorted. We will also look at some space saving techniques and what I call “Tetrising” of LEGO. I get asked about storage a lot so in this video I’m going to give some ideas. I don’t believe in a 1 size fits all approach. I think it depends largely on you and your kids building style and play pattern.
3 Approaches to Sorting
There are generally 3 approaches to sorting and storing LEGO:
- Dump everything into a box / tub and store away. If you only have a small amount of LEGO and won’t / can’t keep things sorted, this is probably going to work best. Downside to this is that it can be a lot harder to find parts. If the majority of the time is spent looking for parts, going to be less likely to want to build and end up being less creative. Then there is the constant clean up of all the LEGO at the end of each session.
- Sort by Colour. Literally what it says. You get containers and sort into colours ie all blue pieces go into blue containers. Good if your building style is more decorative, where colour really matters. So if you are building a red fire truck, you’ll have all the red pieces together. I did this a lot when a kid but the colour palettle was a lot more restricted. Also handy for mosaics. Complications can start arising when parts have more than 1 colour and you mentally have to create rules around how it is sorted ie is it sorted by a dominate colour, function etc
- Sort by Part Type. This is where you look at the individual part and sort by it, or similar groupings. So all bricks go together, all plates go together, all wheels go together etc. This is better for when you are more interested in getting the model constructed in a certain way, or rebricking other models. Ideally everything would be of the same colour but with limited parts, you substitute as best as possible.
We mainly do the 3rd style with sorting by type, with sub sorting by colour and having a bit of a temporary building and dumping ground. So we’ll focus on this more.
Background
Originally the kids did build models and have a large tub to store stuff in. This very quickly become problematic as when they were playing with the models, they might start to lose bits, everything would get dumped into the tub and not really played with again. It also didn’t really encourage them to pull the model apart and build other things.
Von Haus 44 Drawer
Thus we went for this approach to sort things into draws and label the drawers. There will be an affiliate link around the video for these Von Haus drawers. We get a small commission from each sale and it massively helps support the channel and delivering these free videos.
Here is a quick unboxing of one Von Haus 44 drawer, so you can see what you get.
They are really storage for trades, for screws, nails and bits & pieces. In America I think something similar is these Akro-Mils Drawers. For me I’d prefer the Von Haus as these drawers are all small sizes where as the Von Haus has 32 small drawers, and 12 larger ones. I just think that providers more flexibility.
Sterilite
We’ve also seen some American’s use Sterlite drawers, which generally aren’t for sale in Europe (in a cost effective manner). I did manage to get some medium size ones at a clearance sale. While they are quite nice and stackable, the thing I really didn’t like is these drawers don’t come out. So later on if you are reorganizing, you can’t just swap drawers, you have to empty them all out and change the labels over – which really isn’t appealing.
We like these 44 drawers models as they have a mixture of small drawers and larger drawers. So it gives you a range of options to fit small and large LEGO pieces all at once.
Why we like them
one of the reasons are particularly like these drawers is they actually fit Lego really well and they’re an ideal size because you can get 16 studs along and then six studs across and then in bricks three bricks high and it fits really snugly without being too tight so these are you know 2 by 8 bricks so got to put in the back then 2 on top I’m just dropping a couple in so cos you’re six studs wide and you’ve got your 16 goes back and obviously 16 being a nice multiple number then gives you lots of different combinations being able to do other things
another stacking so there’s three high that will fit in there not together it like super tight so later when you want to get back at them they’re relatively easy just to take apart and they fit in snug but still enough that you can get in and get them out relatively easy or yeah of course case naari just take the drawer out and tip it out it’s no big deal and it’s nice because the the drawer when it’s got in the unit itself the two little teeth at the back and the runners so you just gotta get them to the end angles in them up and pop them out like that so they don’t slip everywhere otherwise
Kids Access
We have them down low and the kids can easily access them. Being trade storage, there are holes in the back where you screw them to the wall or anchor them if you are worried about kids pulling them down on top of themselves. They are also handy if you just want to take a couple of them to a specific resorting area or get better access.
Open Backs
One thing to note is the backs are open. So if they do fall over the wrong way, or get held at the wrong angle, stuff can all fall out and get mixed up. That said, if any pieces get the drawers wedged closed, you can always come around the back and just move things around, or take them out, so they can get un stuck and open again
Originally we got 4 of these Von Haus drawers. We initially sorted into plates, bricks, curved and in between, and the last draw had a combination or car parts, technic and minifigs and accessories. We’d also have a draw or so for what I like to call the “weird and wonderful” drawer. Its just pieces that you might only have 1 or 2 of, never likely to have more and don’t really fit nicely within any other drawer.
How to Start Sorting
We’d start off sorting into the smaller drawers and as the drawers filled up, split the parts up further into smaller drawers, or if only one part, put them into the larger drawers. As more and more LEGO came and we sorted through it further, we’d add extra drawers. With spaces allowing for future expansion.
I generally like to start with smaller pieces/studs on the left, and have them increasing as you go to the right.
Tetrising
and then as you go along add to them so you start off here with one by ones then one by twos two by twos two by threes and so forth and then as you go down you can also add so this is a 2 by 4 and then down here you’ve got four by sixes and then six by sixes so then it’s really easy to remember as you stud count increases that you’re generally going left to right and then sometimes down as well.
One thing that you run into pretty quickly with Lego is running out of space these are two two by four drawers which will be at least full and overflowing but optimized space like to go through and I just call it a tetrasing process trying to get as many of the pieces in a nice snug fit so they can take up a minimal amount of space.
So you can make the most effective use of space that you have so we sort of see it at the moment this drawer is completely full and you wouldn’t be able to get any more in because it won’t close and then we still got some left over here but then we do have on other models which are currently being made
Lots more pieces here’s just a base of a little peacock thing the boys has made and you should do what lots of two by fours around the outsides of that there so you just want to make it so that there’s plenty of excess capacity but can be used up a new space in a really efficient way so go through and quickly do a little Tetrising process and you should be able to get everything into this drawer and still have some space left over and see how we go
Now we have it through a process of tetra Singh we’re basically able to take what was one and a bit and get them all into one and you could probably still get another couple of bricks along here the other nice thing with doing it like this if you do it by colors then if I’m building anything and I need Red’s you know two by four you know I can automatically reach in and grab whatever I need.
Or I can start to say okay well I’ve probably got these are in heights of four so there’s 16 there so I only need 10 I’m good if I need 20 or 30 then I might be running into problems so by doing this tetra setting process you can always go through and just optimize your space and just push it a little bit more and gain that little bit extra.
Labelling is Key
Next thing which is also important is to label the drawers. Brick architect has created a PDF with labels for 1,200 of the most common pieces which can be downloaded here https://brickarchitect.com/labels/ . They are sorted into the major categories.
As a cheap and effective entry point, just print a PDF page, take some scissors and cut the labels really tight. From here, take some sticky tape, or stock tape, stick the label to it, then stick it onto the drawer, job done.
In another video, I’ll cover the Brother P-touch labeler and even how to create your own labels for pieces that aren’t part of the 1,200 done by Brick Architect. It’s a bit more advanced but the PDF, scissors and tape will go along way, and will be more than enough for the vast majority of people.
Value of Pictures
These labels are really good as they have the pictures on them. So for any kid that can’t read yet, they can easily understand the pictures. Most people aren’t going to have a clue as to the real names of pieces in any event.
How many people would know a fence piece that is a 4x4x2 Quarter Round? But if you see the picture, you’ll instantly know the piece. It is also great for helping to learn the more technical names and the element ID numbers are also handy for any future ordering.
If a drawer is labelled, if someone happens to empty all of the drawers contents to make a model, you’ll know for later the drawer was actually designated for something. Without a label, you’d have to remember. Doesn’t sound like that big a deal. When you have hundreds of different pieces, you’d need a super memory.
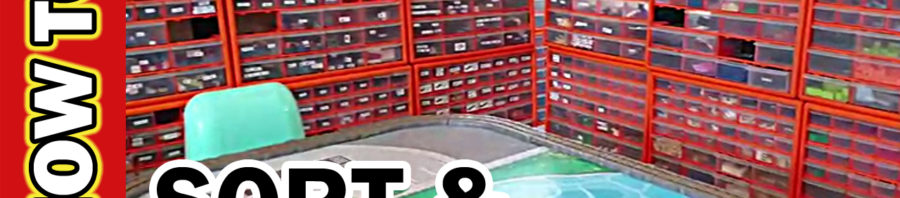
LEGO Table
For us, we have this as a designated LEGO table. It is actually an old Thomas the Tank Engine train table. The track around the edge is great for stopping pieces rolling onto the floor. Underneath it, It also have some larger tubs that can store further larger pieces, they can also come out as well for easier access.
Having it as a work surface is great as the kids can build models, have works in progress, have a play area etc. When it comes time to pack up, all the pieces can end up on the table, and act as a magnet to attract any pieces throughout the house, and be sorted later.
Its great cause them can get all the LEGO off the floor so it doesn’t end up in the vacuum cleaner.
Sort Fest
Which then brings us to the sort fest. Over time LEGO accumulates on the LEGO table and does need to be resorted again. So we sit down with the kids and have some sort sessions to put everything back away. Naturally it isn’t the kids most favourite thing to do. This timelapse here took several hours over the course of several sessions over a weekend.
That said, it means when they have just dumped things previously on the LEGO table and not had to clean up, just shifts the job to doing it in one batch. Which is going to be a more efficient use of time in the long run.
Generally I’ll break the models down and group pieces together. The kids will then sort into drawers. Start with the larger pieces as it feels like low hanging fruit and makes it easier to see smaller pieces. I always think of engineering time and motion studies when doing this and encourage kids to create strategies to do things in an optimal way. Have Moses go to the mountain, not the other way around. Kids always seem relieved when last pieces are put away
It is always a matter of striking a balance. Want the kids to explore ideas and models, but not be scared off building cause every part needs to be put away every session. They also take pride in having a clean LEGO table at the end of a sort feast session.
Key Combination
We think the key is the combination of dedicated LEGO table and the sort feast. Know some others who have drawers and taken the time to do the initial sort, and create labels. But very quickly LEGO ends up everywhere else and the drawers not being effective and seeming like a waste of time, and undoing all the hard work to get together initially. The key seems to be the table and sort fest.
Over time, do have some sorted into colour as well – hang over from Dinosaur and Jack o Lantern pumpkin projects. Click around the video for FREE instructions and time-lapse videos on these LEGO builds.
Really Useful Boxes
I know others use these “Really Useful Boxes” which seem really strong and sturdy for stacking purposes. I haven’t looked into them too much and don’t know the type of tray insets they can have, which would be the key part for me. I think for larger items they might work really well but the downside would be not having them with quick easy access. Here is the better part of 1,000 different parts, all of which can be accessed in seconds so don’t have to play musical boxes.
Technic Expansion
With anything that’s been going along recently and sorting out some Technic like to create one of these weird and wonderful drawers we sort of put all the pieces which do quite neatly fit within quantities elsewhere. And then over time you notice that you actually start building up enough to create their own separate drawer.
I like to leave the spaces so it allows for future expansion for instances like this so just come along pop it in your drawer pop in the new label just going to be a six tooth small sprocket depend all the printout get the bag tape off their labels on there and then just go through wonderful
joy that’s nice man some ones which are left now just the other sorts of circles and fan blades and things like that and that’s how you can easily expand the rest just don’t have labels on yoke just go to here around to doing it it is possible that if you then wanted to completely read you get everything just take that over go up swap and I am
What do you Do?
What do you do for storage? How do you manage LEGO? We are always on the look out for new ways and ideas so sound off in the comments below.
In another video, I’ll cover the Brother P-touch labeler and even how to create and customise your own labels – so be on the lookout for that.
Please Subscribe
Please visit mattelder.com and subscribe so you can be kept in the loop with new videos and exclusive content, regardless of any YouTube algorithm changes.
Thanks very much for watching, I know this has been a long video but wanted to cover in depth a number of aspects so you can go off successfully and implement your own strategies. Here are some other videos you might be interested in. Til next time when we talk about all things LEGO


