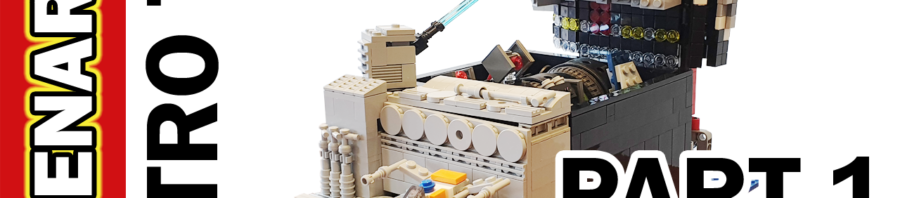
In this video we are going to look at what we are calling our “LEGO Scenario” creations. You might be looking at this and wondering what exactly is it that I am looking at. We like to think of it as a LEGO version of a snowglobe, or a diorama.
Think of it as a cross between LEGO building with micropolis, mosaics, technic, architecture and Dots techniques all thrown into the mix. Add a little motion and wrap it up in a narrative.
#legoscenario #scenario #legodots #mosiac #legomosaic #LEGO #legomoc #legoart #moc #legomocs #legobricks #afol #mocs #legobuilder #legoideas #legocreations #legoinstragram #legofan #afolclub #legomania #dotyourworld #legostarwars #legostarwarsmoc #starwarslego #greatwaveoffkanagawa #greatwave #london #london4all #legolondon #legoarchitecture
Transcript from the show:
G’day Everyone, Matt Elder of mattelder.com and in this video we are going to look at what we are calling our “LEGO Scenario” creations. You might be looking at this and wondering what exactly is it that I am looking at. We like to think of it as a LEGO version of a snowglobe, or a diorama.
Think of it as a cross between LEGO building with micropolis, mosaics, technic, architecture and Dots techniques all thrown into the mix. Add a little motion and wrap it up in a narrative.
This is a Family Bricks video. Be sure to hit that like button, share or be super awesome and subscribe! Click the bell and select “All”, to be notified of new videos as they are uploaded.
Introduction
In this video we’ll be covering what these LEGO Scenarios are, the main components, a look at the 3 different themes created here, the standard developing, look at the individual components, the gears involved, origin of the name and ideas on the future direction. This is going to be a longer than usual video.
The concept is based upon wrapping one of these new DOTS bracelets around standard LEGO wheels. Once you do that and pop an axle through the wheel, it opens all sorts of possibilities for motion and storytelling. Sometimes have to think this would have been the furthest thing from the minds of the designers of the bracelets. That is the joy of LEGO – people will mould it for their own uses beyond its original inception.
3 Themes
Here we’ve themed out 3 “Scenario” examples – one being based around Star Wars, another being the city of London, and another the famous 19th century Japanese print “The Great Wave off Kanagawa”. Each of these have varying levels of complexity so hoping to create an entry point for various ranges of abilities.
These Scenario boxes we like to think of as a blank canvas or framework. Then they can be “skinned” or themed out in any creative way you can think of. A lot of the time when building something mechanical with moving parts, it becomes a single use design and can’t be adapted for anything else.
The goal was to try to come up with a universal base design so don’t have to keep reinventing the wheel each time. So, a fair amount of time was spent on the engineering side, prototyping, reaching dead ends, cycling back and starting again. I’m not a Technic guru and know enough to get by. I’m sure these can be further refined by experts but gives a solid foundation.
At this size, feel that it will enable one to create scenarios based around favourite scenes from books, movies, TV shows, artworks, cities or any other popular culture idea or subject matter. It also means you don’t need thousands and thousands of pieces and months to build. Thus, it helps to keep it accessible to everyone.
Main Components
There are 4 main components to a LEGO Scenario – The Action/Wheel Box, Front Display, Billboard and Drive source (either a hand or a motor). Designed it around a 16×16 plate and interconnecting modules. This seemed like a striking a good balance between size and ultimately cost. It hooks into the already existing design language of micro builds. Connections can be made to micropolis layouts and add motion to cities.
Lets start off by looking at each of the 3 themes.
Star Wars
This is the Star Wars Scenario. It is based around Episode 4, apart from the minifigs. The front box has is the trench run scene with Luke’s x-wing, which moves side to side. Also has a gun turret that spins around trying to shoot down rebel ships. There is this maintenance panel which opens so you can get in and make any subtle adjustments to the gears if you need to. This is my first attempt at any serious grabbling, or creating the hint of detail and was a fun process.
Moving to the action box you have the rebel ships on the middle wheel flying in one direction, while the Empires ships on the other 2 wheels flying in the opposite direction to intercept.
Ships here are the Tie Fighters, Tie Bomber, and a couple of Star Destroyers. For the rebels, an X-wing, Tantive IV and or course the iconic Millenium Falcon. A few colours might be slightly off but just dealing with the colours and pieces that we have available to us.
On the billboard we have the Death Star in the process of firing the primary weapon. The Death Star itself does have a subtle light relief effect going on over the space of 4 tile heights. Tried to have the main dish area a little countersunk. Being the 16 bricks wide, think it has a nice rotation effect.
The other scene is from the climax of Empire Strikes back with Luke and Vader fighting it out on the Cloud City platform. Been challenging to create the platform in alternating 1 and 2 brick wide sections. Think it has turn out OK and really opens up possibilities with being able to include minifigures. Yes there is some slight inconsistency with scale but think of it as artistic licence. Like when you see movie posters with giant background heads and tiny foreground elements.
My apologies to any Star Wars purists out there. We are probably casual Star Wars LEGO fans so the minifigs have all been mixed up and we only have a handful (yes I know Luke wasn’t wearing his orange flight suit in this scene but you get the idea).
One thing to note, due to the tight tolerance of one of the Star Destroyers, the wheels will only rotate in one direction (as the Star Destroyer can be massaged through the gap. If it tries to go the other way, it just gets stuck. That’s why you might hear a slight clicking sound as the Star Destroyer goes around).
London City
Next up is the London Scenario. We’ll start off with the Action box as it has the icon London red double decker bus. Here we’ve mixed up the colours of the bands to go with the ground type. The first band is teal with trees and parkland type environments. The next band is a road with the bus, car and pickup truck. The next band has a train and some track.
The blue medium azure band is a water way with sail boats and a cargo ship. The last band rounds out with some more trees and foilage, and a plane flying past.
The holes that allow you to adjust the strap while wearing are slightly larger than a stud so if you try to put anything into the hole, it will just fall out. We did find however that if you have a cone piece inverted and push it in, it will start to clutch the cone piece. The clutch isn’t brilliant but enough to hold the cone if you get it just right.
That was how we managed to get some of these trees in. Otherwise as the band goes around, it will have ‘gaps’ where no pieces are attached.
Onto the billboard. The billboard is a 16×16 design so you have to get creative with any mosaic image you come up with. Here we’ve gone for Big Ben and a cloud in light relief. The bottom 3 or 4 rows you always have be careful when designing as you get the elements from the spinning bracelet bands possibly getting caught on them. The front display is a general waterfall scene over some rocks. It gives away to get from top of the Action Box down to any other micropolis base you might want to connect.
This Scenario I did want to keep simple without too many crazy and elaborate building techniques. The 5 bands in the action box we’ve gone a little overboard to show possibilities of planes, trains, automobiles and everything in between. If this wasn’t so much a demonstration piece, I’d probably lose on type of transport and just let the Action box “breath” a little more.
Great Wave Off Kanagawa
Lastly is the “Great Wave off Kanagawa” Japanese print design. Here is laid out the moving billboard image and the design it is based off. This shows the LEGO Scenario can be applied to other media, in this case artworks and designs.
Again used subtle relief for depth as the waves in the front are slightly higher than those in the back. We’ve used quarter circle white tiles to give the wave a better feel of organicness as originally it feel very blocky. Also used transparent blue round studs over blue plates to give a couple subtle shades of blue. There is Mount Fiji in the background but like the original print, it is subtle.
OK, we’ve wrapped the design around the drive train for that and now we’ll move onto the middle wheel action box. This box is driven by a series of pulleys and rubber bands. The effect that I was going for is the waves closer to you move faster and break more dramatically. The wave in the back has that effect of being further back so slower moving and more subtle. Much like if you stood on a beach looking out at the waves – those closest to you are crashing with quick movements, those in the far distance moving a little more slowly.
The middle wheel has a fishing boat, also present in the original image but more of a second read item. It travels in the opposite direction to the waves and at a speed that is slower than the fastest wheel, but faster than the slowest wheel.
For purposes of this demonstration, I’ve done the back 2 sides in transparent pieces. Thus you can see more the gears, pulleys and what is happening inside the Action box.
The front display is imaging what might be below the water line, so very much where you can start to make your own creative interpretation of extending the scene. So there is some green seaweed locked in between 1x6x5 panels, along with some transparent blue studs.
In the middle is actually a whole section of these studs. I’ve also put a little wheel mechanism in there so it can churn up all the studs. The mechanism is a little undercooked as the little studs can make it really difficult to turn and needs further refinement. But conceptually showing you what else could be don e. and trying to add a further dynamic motion of the sea churning.
End of Part 1
I’ve decided to split this video into 2 or 3 parts and here seemed like a natural breakpoint. Check for the next video in the series around this one which will cover a more detailed look at the developing standard, mechanics and how it may develop into the future.
This is a Family Bricks video. Be sure to hit that like button, share or be super awesome and subscribe! Click the bell and select “All”, to be notified of new videos as they are uploaded.
Thanks very much for watching. Here are some other videos you might find of interest. Until next time when we talk about all things LEGO.


